
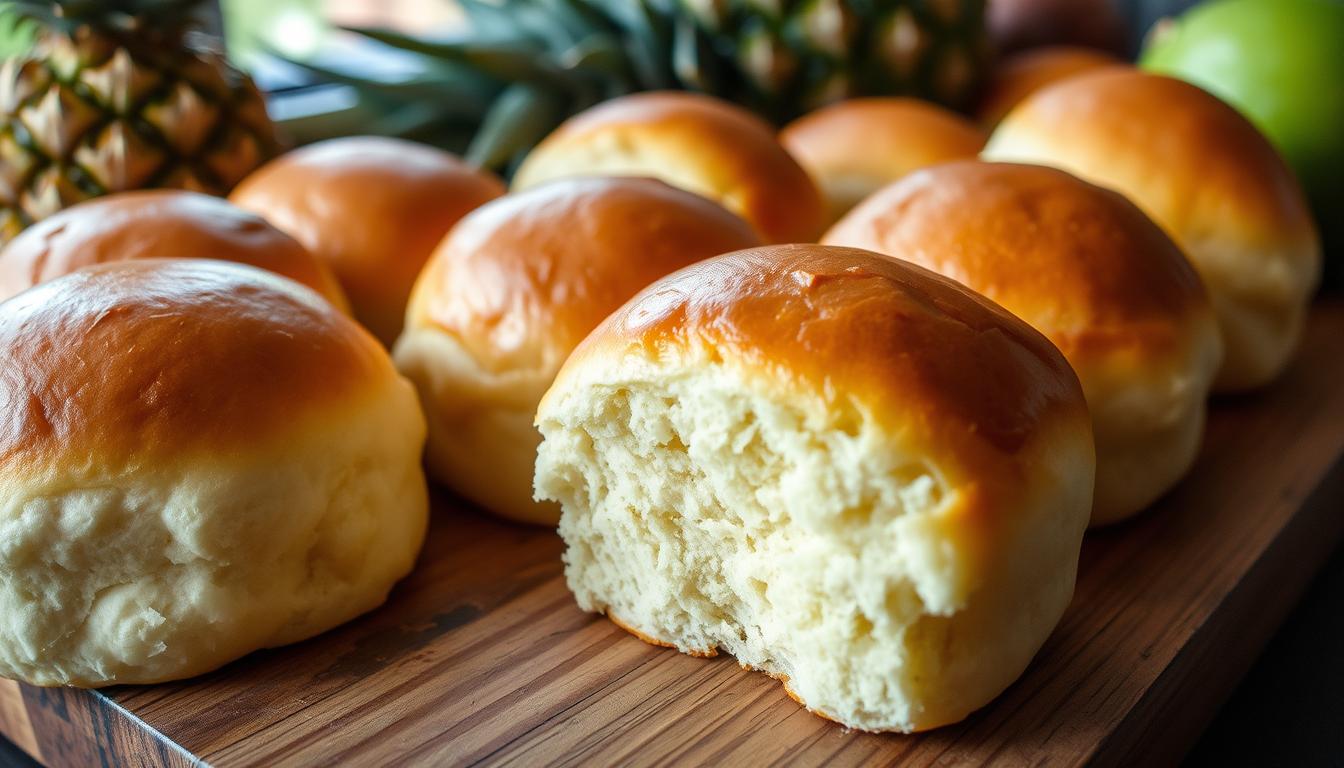
Gluten-free Hawaiian rolls are no longer just a dream—they’re a delicious reality. After discovering my gluten sensitivity, I refused to say goodbye to those soft, sweet rolls that were a staple at family gatherings. Instead, I set out to reinvent them without losing their irresistible flavor or texture.
This guide is your key to mastering homemade gluten-free Hawaiian rolls. Whether you’re managing food allergies or simply exploring allergen-friendly options, you’ll find everything you need to make rolls that are warm, fluffy, and just as delightful as the originals.
Picture this: sinking your teeth into a pillowy-soft roll with that signature sweetness you’ve always loved—but made entirely gluten-free. With the right ingredients and a bit of guidance, you can recreate this classic treat and wow everyone at your table, no matter their dietary needs.
Key Takeaways
- Master the art of gluten free Hawaiian rolls at home
- Discover allergy-friendly baking techniques
- Learn how to achieve authentic Hawaiian roll flavor
- Create rolls that are both delicious and diet-friendly
- Understand the science behind successful gluten free baking
- Explore versatile serving options for your homemade rolls
Understanding the Magic of Hawaiian Sweet Rolls
Hawaiian sweet rolls are a special treat that turns simple ingredients into something amazing. They are loved for their unique taste and soft texture. Making gluten-free versions is both a challenge and an adventure.
The story of these rolls is rooted in a rich cultural mix. They blend Portuguese and Hawaiian baking styles. This mix creates a taste that’s loved during the holidays.
Origins and Traditional Ingredients
Traditional Hawaiian sweet rolls use ingredients that make gluten-free baking tricky:
- Wheat flour as the main ingredient
- Whole milk for extra richness
- Multiple eggs for strength
- Plenty of sugar for sweetness
Why These Rolls Are a Holiday Favorite
Hawaiian sweet rolls are loved for their versatility and taste. Their sweetness and softness are ideal for:
- Holiday meals
- Slider sandwiches
- Breakfast items
- Potluck dishes
The Challenge of Making Them Allergen-Free
Making allergen-friendly bread that’s like the original is a challenge. Gluten-free baking needs the right ingredients and careful measurements. This is to get the classic Hawaiian sweet rolls’ magic right.
“The secret to great allergen-free baking is understanding the role of each ingredient and finding perfect substitutes.” – Gluten Free Baking Expert
| Traditional Ingredient | Allergen-Free Substitute |
|---|---|
| Wheat Flour | Gluten-Free Flour Blend |
| Whole Milk | Almond or Oat Milk |
| Eggs | Flax Eggs or Aquafaba |
Essential Tools and Equipment for Perfect Gluten Free Baking
Gluten free baking needs special tools for the right texture and consistency. Your kitchen should have key tools for gluten free bread and rolls. These tools make baking smoother and more predictable.
For gluten free baking, you need some important equipment. This ensures your bread and rolls are delicious every time:
- Stand Mixer: Crucial for thoroughly mixing gluten free bread dough
- Digital Kitchen Scale: Provides precise ingredient measurements
- Digital Thermometer: Helps monitor water and dough temperatures
- Specialized Baking Pans: Ensures even heat distribution
Accuracy is key in gluten free baking. A digital kitchen scale helps measure ingredients precisely. This is crucial with alternative flour blends. The stand mixer mixes ingredients evenly, avoiding clumps in gluten free dough.
| Tool | Purpose in Gluten Free Baking |
|---|---|
| Digital Thermometer | Ensures optimal yeast activation (95°F-110°F) |
| Kitchen Scale | Precise flour measurement (typically 450g total) |
| Bread Machine | Recommended: Zojirushi with gluten-free setting |
Your digital thermometer is key for yeast proofing and water temperatures. Warm water between 95°F and 110°F activates yeast perfectly for gluten free bread. Gluten free dough needs special handling, unlike traditional bread.
“The right tools transform gluten free baking from challenging to enjoyable.” – Gluten Free Baking Expert
Investing in these tools will greatly improve your gluten free baking. You’ll make soft, delicious Hawaiian rolls and bread that everyone will love.
Key Ingredients for Gluten Free Hawaiian Rolls
To make gluten free Hawaiian rolls, you need the right ingredients. They should be sweet and soft, just like the classic ones. Choosing the right mix is key to getting that authentic taste.
The Perfect Gluten Free Flour Blend
Choosing the right flour blend is essential. Here are some top picks:
- Cup4Cup gluten-free all-purpose flour
- Steve’s Gluten-Free Bread Blend
- Homemade blend with 3 cups of gluten-free flour
These blends often include xanthan gum. It helps the dough stick together, just like gluten does.
Natural Sweeteners and Flavor Enhancers
| Ingredient | Quantity | Purpose |
|---|---|---|
| Pineapple Juice | 1/2 cup | Natural sweetness and tropical flavor |
| Honey | 1/2 cup | Additional sweetening |
| Brown Sugar | 2 tablespoons | Depth of flavor |
Dairy-Free and Egg-Free Alternatives
For those with dietary restrictions, there are good substitutes:
- Replace milk with almond or oat milk
- Use Earth Balance as a butter alternative
- Substitute eggs with applesauce or flax eggs
“The secret to great gluten free Hawaiian rolls is balancing flavors while maintaining a soft, tender texture.”
With these ingredients, your gluten free Hawaiian rolls will be a hit. They’ll be delicious for everyone to enjoy.
Step-by-Step Mixing and Dough Preparation
Making gluten free Hawaiian rolls needs precision and care. How you prepare the dough affects the bread’s texture and taste.
- 400 g FREEE gluten free white bread flour
- 7 g dried gluten-free yeast
- 2 tablespoons caster sugar
- 1 teaspoon xanthan gum
- 1 teaspoon salt
To activate your yeast, create the right environment. Mix 150 ml warm water with 10 g whole psyllium husk. Temperature is key – keep it between 85-95°F for best yeast activation.
“Precision in gluten free baking transforms good recipes into extraordinary meals” – Gluten Free Baking Expert
How you mix is important for healthy Hawaiian rolls. Use medium speed for 3-5 minutes. This mixes well without overworking the dough.
| Ingredient | Quantity | Purpose |
|---|---|---|
| Pineapple Juice | 250 ml | Sweetness and Moisture |
| Vegetable Oil | 5 tablespoons | Texture and Flavor |
| Apple Cider Vinegar | 1 teaspoon | Yeast Activation |
Add your wet ingredients slowly – 2 eggs, 5 tablespoons vegetable oil, and 1 teaspoon apple cider vinegar. Aim for a dough that’s smooth and just right, not too sticky or dry.
For the best gluten free bread, let the dough rest and rise in a warm, draft-free spot for 40-60 minutes. This helps the psyllium husk add the right moisture and structure to your Hawaiian rolls.
Mastering the Art of Shaping and Rising
Creating perfect gluten free Hawaiian rolls needs careful shaping and rising. Gluten free baking is special. It makes sure your rolls are soft and tasty.
Dough Temperature Control
It’s important to control your dough’s temperature for great gluten free Hawaiian rolls. Keep it warm, between 110-115°F, when you add yeast. This warm spot helps your dough rise well.
- Use a kitchen thermometer to check water temperature
- Keep dough in a draft-free warm area
- Maintain consistent temperature during rising
Creating Uniform Roll Shapes
Getting your rolls to look the same is important for a professional touch. Use a kitchen scale to make sure each dough ball is 1.4-1.6 ounces.
| Roll Size | Weight Range | Quantity |
|---|---|---|
| Large Rolls | 1.6-2.0 ounces | 16 rolls |
| Small Rolls | 1.4-1.6 ounces | 26 rolls |
Rising Times and Techniques
Gluten free dough only rises once, so timing is key. Give it about 15 minutes for the second rise while your oven heats up. Instant yeast is faster than active dry, cutting down proofing time.
“Patience is the secret to perfectly risen gluten free rolls” – Gluten Free Baking Expert
Pro tip: Keep salt away from yeast to avoid slowing down rising. With the right temperature, shaping, and rising, you’ll make amazing gluten free Hawaiian rolls every time.
Baking Tips for Soft and Fluffy Results
Making the perfect gluten free hawaiian rolls needs care and focus. Your baking journey begins with knowing the key elements. These elements turn a simple dough into soft, fluffy bread that everyone loves.
Essential Baking Guidelines
- Preheat your oven to 350°F for consistent baking
- Use an instant-read thermometer to check internal temperature
- Aim for an internal temperature between 205-210°F for perfectly baked healthy hawaiian rolls
The secret to amazing gluten free bread is mastering temperature and timing. Your rolls will get a golden crust and stay tender inside. This happens when you use these expert techniques.
Baking Process Breakdown
| Baking Parameter | Recommended Setting |
|---|---|
| Oven Temperature | 350°F |
| Baking Time | 20-25 minutes |
| Internal Temperature | 205-210°F |
Pro tip: Let your gluten free hawaiian rolls cool for at least 15 minutes before slicing. This keeps them at their best texture and moisture.
“Baking is an art, and gluten free bread requires extra patience and precision.” – Gluten Free Baking Experts
When making your gluten free bread, remember that different flour blends can change the results. Use weight measurements for the best results. And don’t be afraid to try new things until you find your favorite recipe.
Storage Solutions and Make-Ahead Options
Keeping your allergen friendly bread fresh is key. Your healthy Hawaiian rolls need special care. This helps keep their taste and texture just right.
Freezing and Thawing Techniques
Freezing is a great way to keep gluten free bread fresh. Here’s how to do it right:
- Cool rolls completely before freezing
- Wrap individually in plastic wrap
- Store in airtight freezer bags
- Label with date of freezing
Maintaining Perfect Freshness
Here are smart ways to keep your gluten free Hawaiian rolls fresh:
- Refrigerate for up to 3 days
- Reheat at 350°F for 10-15 minutes
- Ensure internal temperature reaches 190°F
Pro tip: Slice rolls before freezing for easier portioning and quicker thawing!
To reheat frozen rolls, preheat your oven to 400°F. Warm them for 10-15 minutes. This keeps your bread soft and tasty.
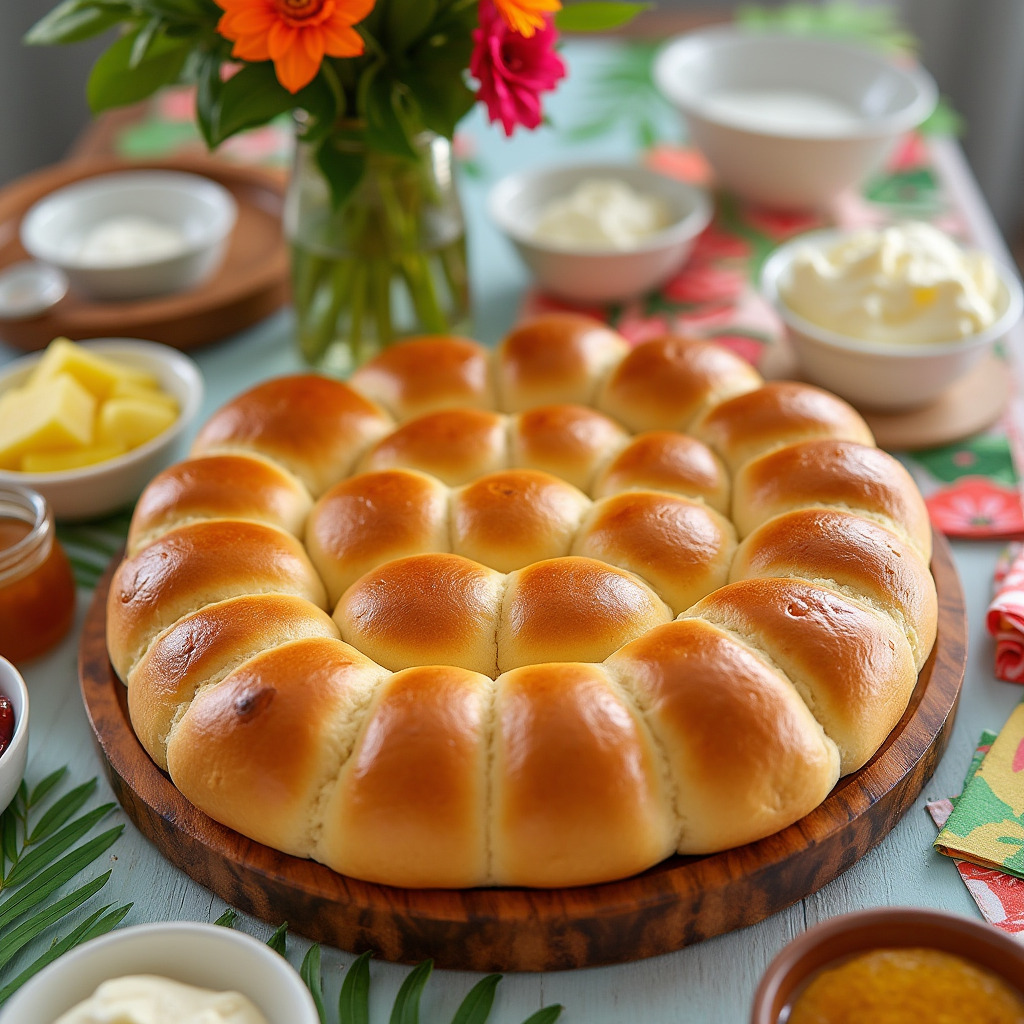
Serving Suggestions and Meal Pairings

Your homemade gluten free Hawaiian rolls are incredibly versatile. They can transform multiple meal experiences. These nut free Hawaiian rolls provide a delicious foundation for creative dining options. They suit various occasions and taste preferences.
Here are some exciting ways to enjoy your healthy Hawaiian rolls:
- Mini Sandwich Sliders: Use rolls for bite-sized sandwiches with pulled pork, chicken, or vegetarian fillings
- Breakfast Benedict: Split rolls and top with poached eggs and hollandaise sauce
- Holiday Meal Accompaniment: Serve warm alongside roasted meats and seasonal vegetables
- Appetizer Base: Create delightful party bites with cheese, spreads, and fresh herbs
For optimal enjoyment, consider these serving tips:
- Warm rolls slightly before serving to enhance their soft texture
- Experiment with different protein and vegetable combinations
- Store leftover rolls in an airtight container for up to 3-4 days
Pro tip: Your gluten free Hawaiian rolls can be the star of both casual and elegant dining experiences!
Nutritional considerations make these rolls an excellent choice for health-conscious individuals. With only 190 calories per serving and balanced macronutrients, they fit seamlessly into various dietary plans.
Conclusion
Starting to bake gluten free can turn your kitchen into a creative space. You’ll learn to make allergen friendly bread, like gluten free Hawaiian rolls. These rolls will be just as tasty as the traditional ones.
Gluten free baking needs patience and care. Every roll you make is a win, showing you’re getting better at using different flours and rising methods. Your hard work will make rolls that everyone can enjoy.
Keep trying new things with your gluten free Hawaiian rolls. Your kitchen is a place to try out new recipes and ingredients. Share your baking with others and feel proud of making food that everyone can enjoy.
Your gluten free baking journey is just starting. With each batch, you’ll get better and make memories. Stay curious, keep trying, and enjoy the yummy results of your hard work.
2 thoughts on “Gluten Free Hawaiian Rolls: Sweet Bread for Allergy-Friendly Meals”
Comments are closed.